Registering a Table
Overview
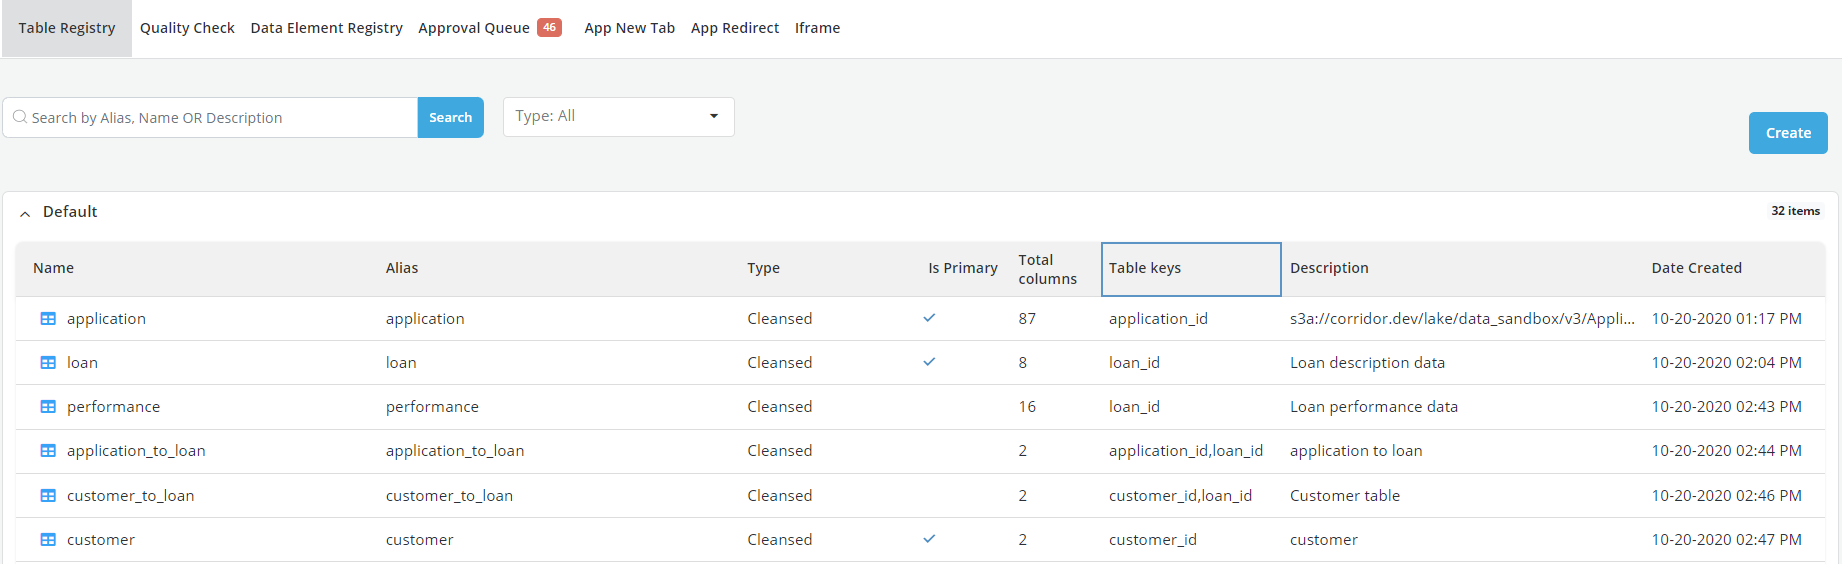
Table registry allows users to record on the platform the location, content and structure (i.e., keys) of the source data tables that would be used to run analytics on the platform.
The platform comes pre-populated with entity IDs (Prospect ID, Application ID, Account ID and Customer ID). If a table contains another ID beside the main entity IDs that user wants to specify during a table registration then the IDs should be registered first before the table registry.
Where is this done?
The table is registered using Table Registry option in Data Vault.
Register a table
Register new Table
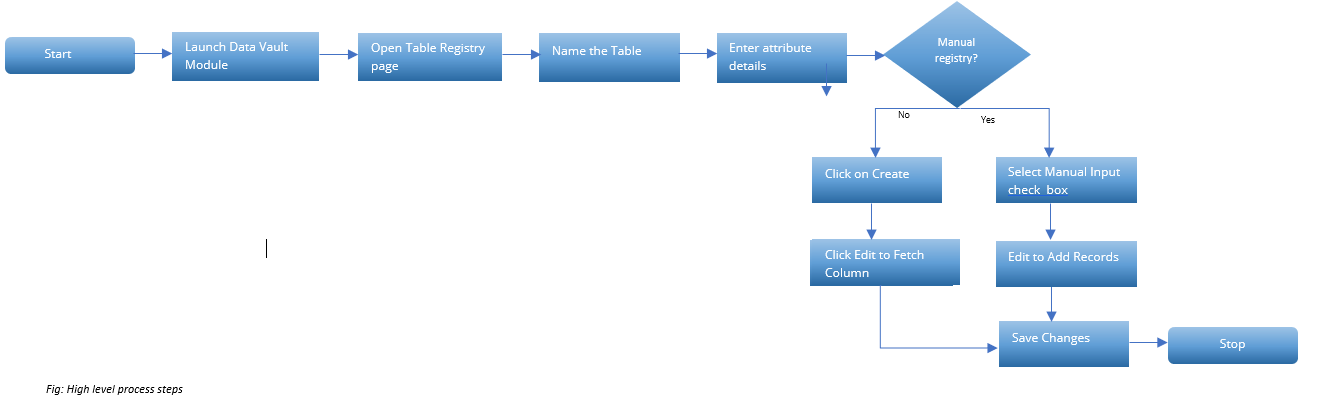
Process Flow
-
Click on Table Registry within Data Vault
-
Click on Create
- Click on New Table and give the name to the New table
- Click on ✔

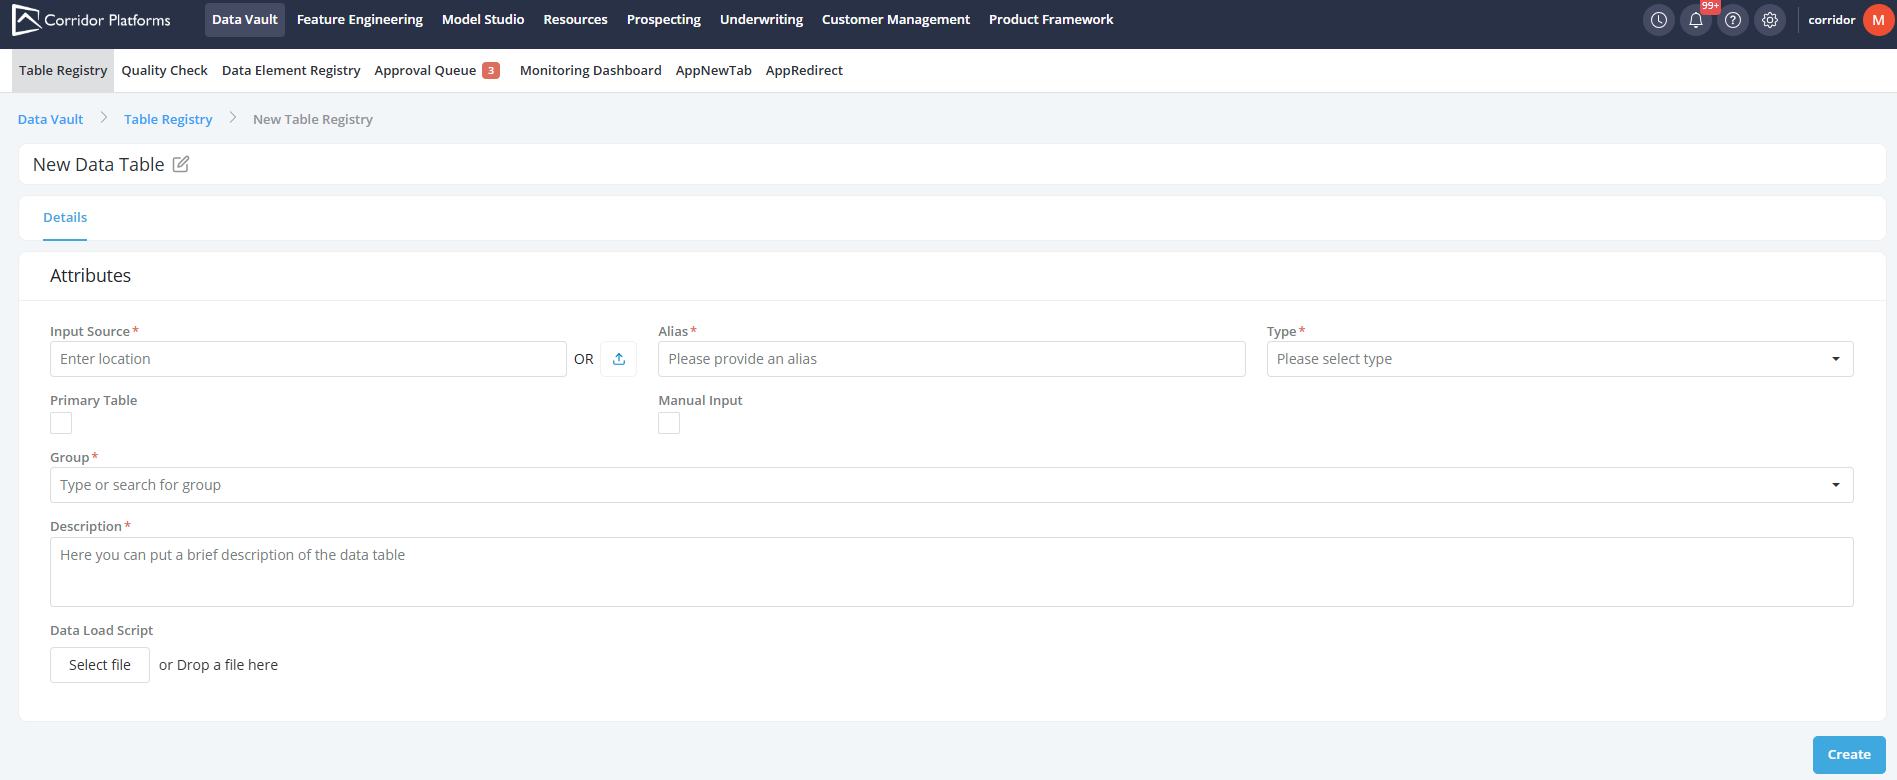
Attributes
-
Enter the Location or upload the file
-
Enter **Alias
-
Select the Type of table to be uploaded from the drop-down
- Raw- For tables that you want to explore but not use yet
- Cleansed- Most commonly used, when the data is ready to be used and is reliable/cleansed
-
Primary Table- A primary table is a table that contains an exhaustive list of all existing IDs for a given entity (for instance the Application primary table should be a table that contains all the application IDs). There can only be one primary table per entity and that table should be identified by clicking on the Primary Table check box.
-
Manual Input this option gives the facility to specify the columns of the table manually. If not checked the platform will automatically fetch the columns. Input mode can only be specified once, at the time when the table is first created. It cannot be changed after a table has been created. Scroll down and refer section on Manual Input Registration.
-
Enter the Description
-
Click on Create button at the bottom.
-
A pop-up message is displayed for a successful save of the table. The table is registered now
Edit Table
-
The table requires some editing before it can be populated
-
Click on Edit
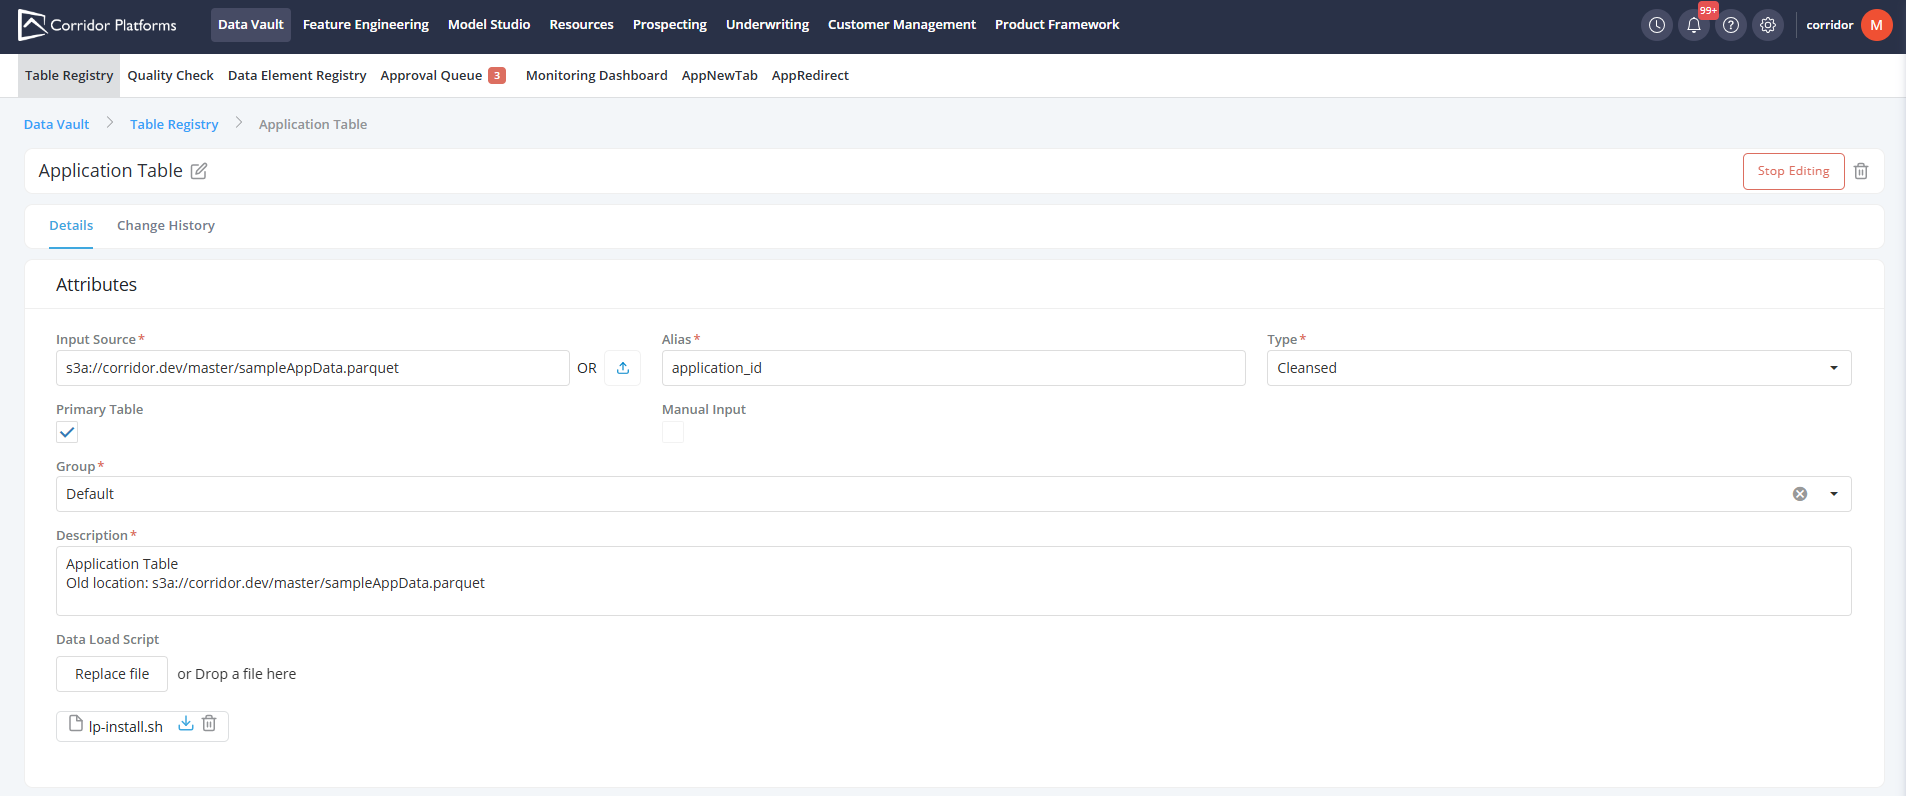
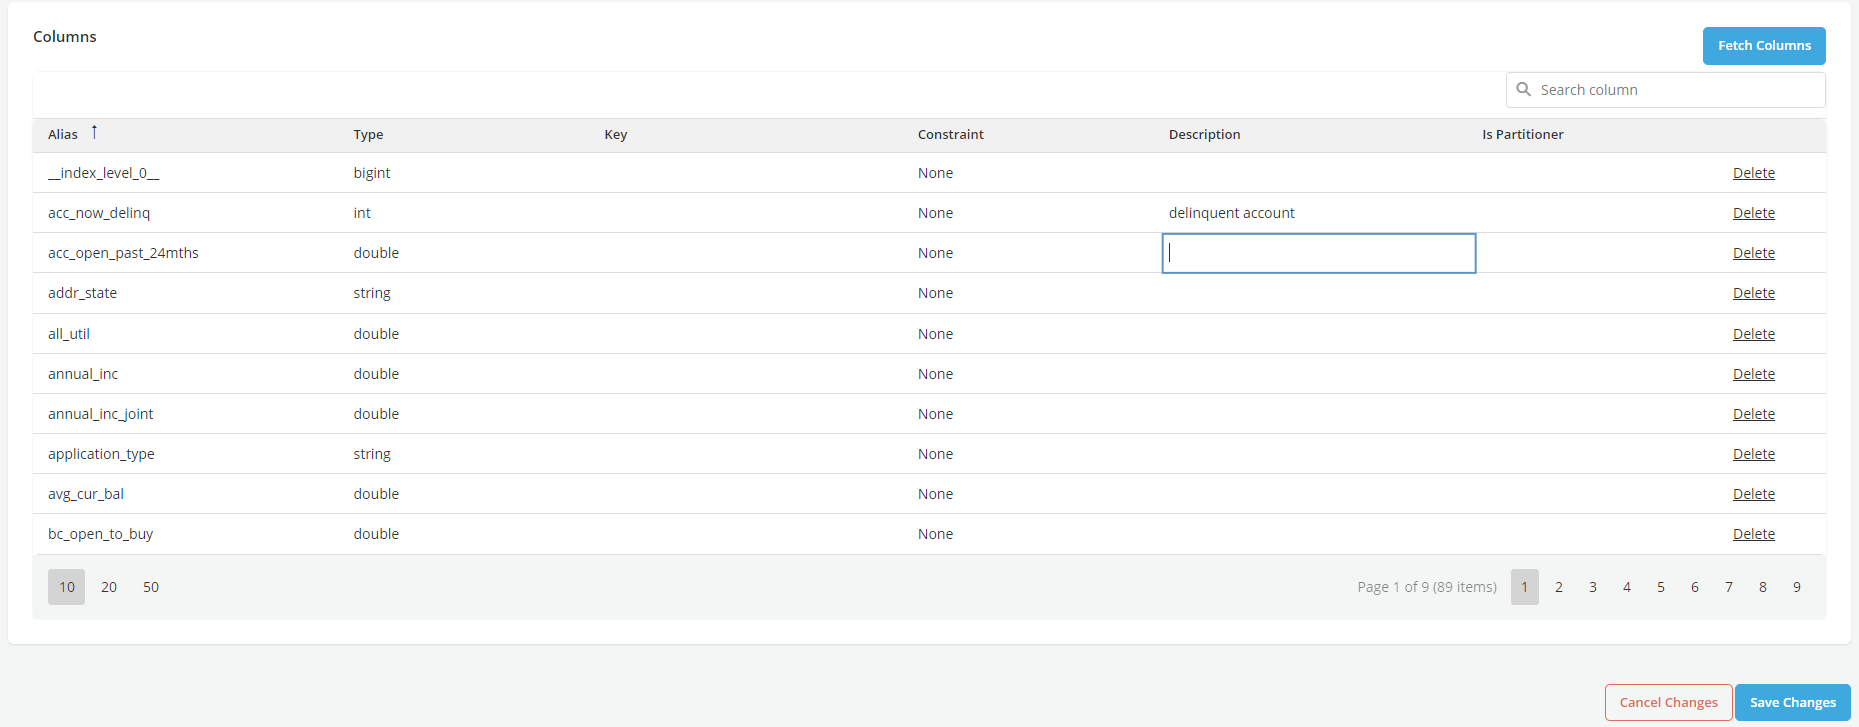
- Scroll down to the bottom and click on Fetch Columns (if the Manual input button has not been checked).The system is trying to fetch the data from the location specified earlier. Entire data will be exported on the screen. Validate the data. If there is any modification required, go to the file and make the changes. Repeat steps 1-13 and again fetch the data.

-
Data is fetched from the table
-
Enter the values in Key column (only for the fields that you want to use as keys)
-
Select the Key from the drop-down (These are set up in Settings)
- Select the appropriate Constraint- Unique or Primary (this last option is only available for primary tables)
-
In the Is Partitioner field set the value to True for any column that you would want to use to partition the data during your simulations
-
Manually add/edit a description to each column. This allows users to understand what each column means
- Scroll down and click on Save Changes
-
A pop-up message is displayed showing that the table is successfully saved. If the system returns an error, all the changes mae after the last save will be lost
-
Click on Stop Editing
-
Click on Table Registry in the breadcrumb. The new table is registered and can be seen on this screen and is available to use in downstream processes and save the changes once editing is complete.

Tip
Any column in the table can be registered as a Data element and used to filter the data during simulations but only the columns identified as partioners can be used to partition the data.
Register the table manually
Register new table manually
- For creating the table Manually, check the Manual Input checkbox
Edit a Table
- To edit the table click on Edit
- Click on Add Record to add a record manually in the table
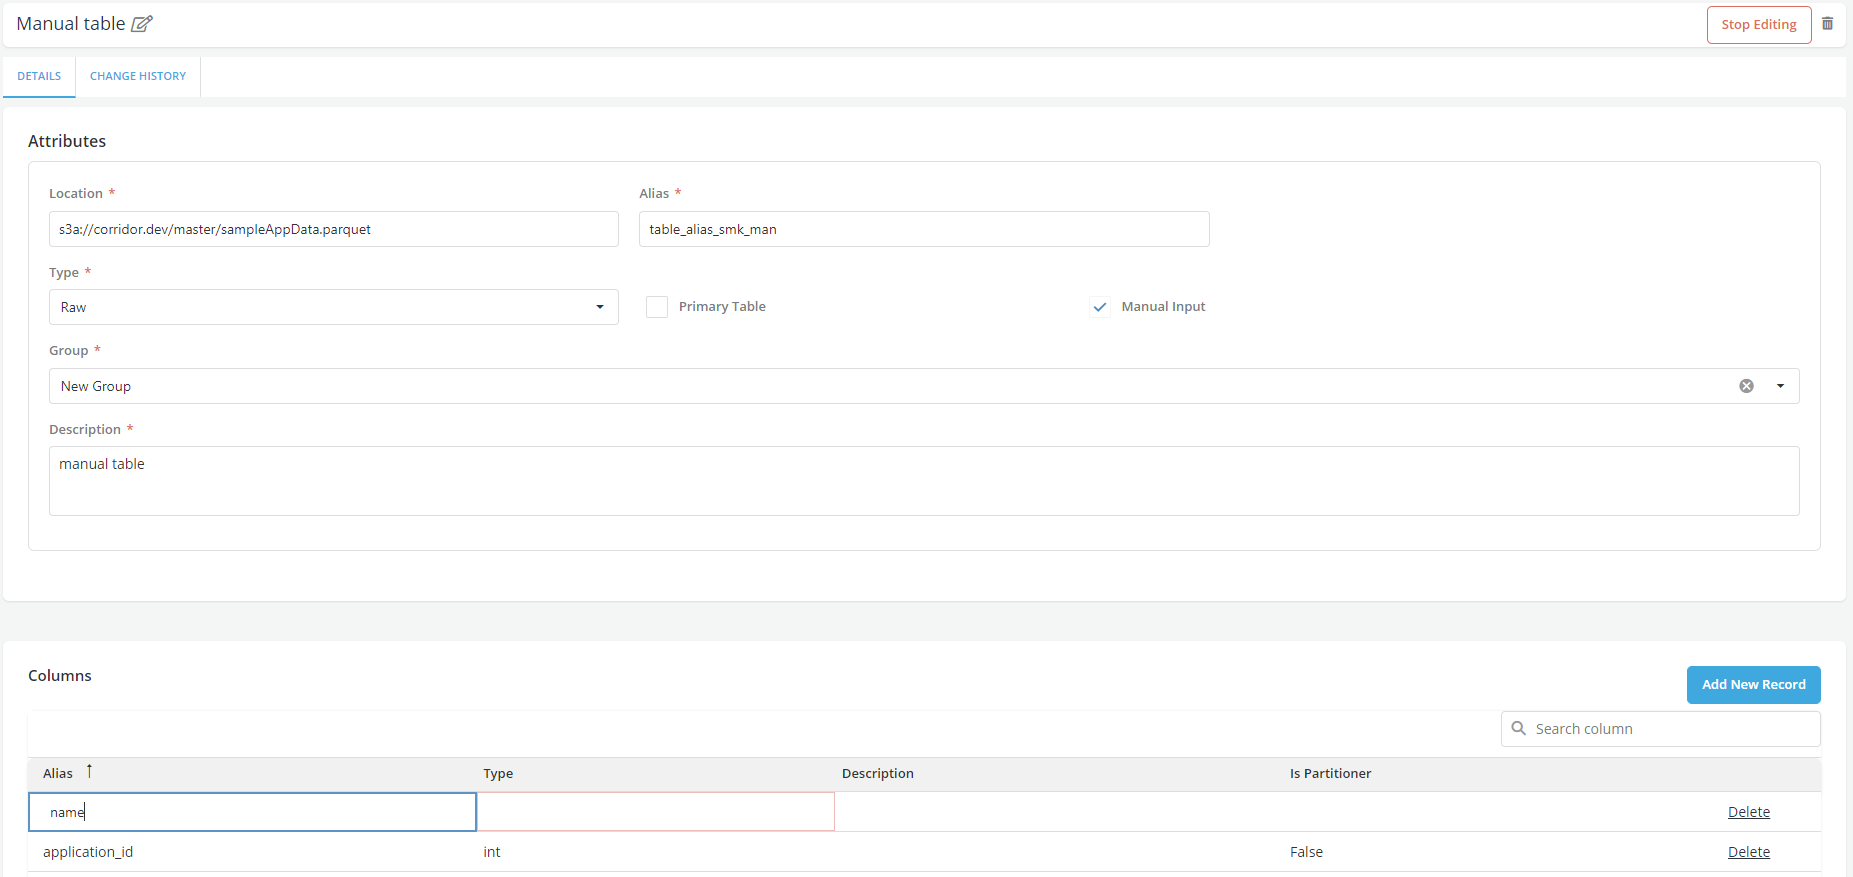
- Save Changes after adding the record and Stop Editing